Well I’ve been back using GNS3 to simulate some networks professionally. Â And well, I hit a roadblock of a strange kind.
In my “LAB” I want to have a ESXi host talking to vCenter, and I wanted to setup a custom logging program which logs to MSSQL, and Maybe Oracle.  For routing I need Junos and cisco IOS.
Now the problem is that takes a little bit of everything. Â The Qemu bundled with GNS3 horribly ancient, and my attempt to drop in Qemu 1.6.0 just fails. Â Also running things like Windows Server 2008r2 and ESXi run best under VMware. Â The SQL server stuff can be any version, so even NT 4.0/SQL 7 is fine which GNS3’s Qemu can run, but it is kind of slow. Â Which I know it isn’t fair to compare something like Virtual Box to VMWare.
So ideally the best  bet is to tie them all together, and I found a way.
First I’m using VMWare Player version 6.0.1 build-1379776.  The people financing this insane project have things like VMWare workstation but I have to download it through them, and their link is insanely slow, so I’m sticking with the player for now.  But I was able to persuade a user to extract “VMware Workstation 10.0.2 build 1744117”, and retrieve two files for me,  vmnetcfg.exe and vmnetcfglib.dll.  So this way I can setup VMWare network interfaces which GNS3 can then latch onto with pcap.
The feature was available in earlier versions of VMWare Player, but the needed files were removed in the latest version. Â However I found if you have access to a new version of VMware Workstation you can just snag these two files, and run them like this (as administrator):
rundll32.exe vmnetcfglib.dll VMNetUI_ShowStandalone
And now you can setup some networks.
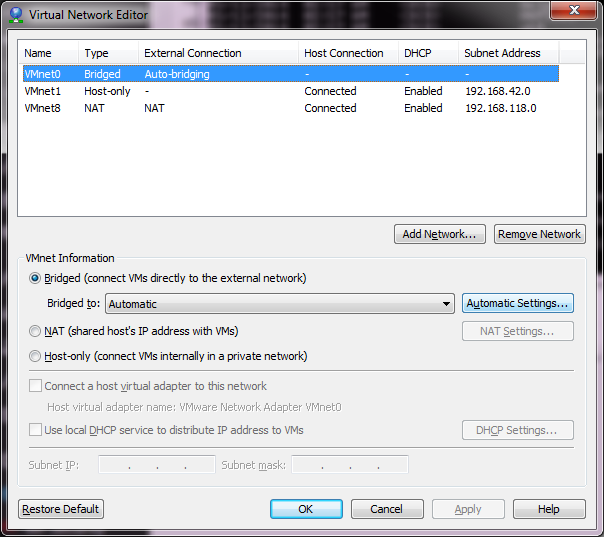
VMware’s default network setup
Now from what I have read online, the best thing to do is leave the default networks alone. Â However I found that if I left VMNet0 to the defaults I was unable to join any VM’s to the different networks. Â So I bind this to my physical Ethernet connection.
Now I want to have various network points to attach VMs onto. Â The best part that I’ve found is that pcap works on these networks for both listening and injection, so these make better ‘hub’ inspection points IMHO. Â Also this means you can run emulators that inject libpcap as a method of communication (SIMH, WinUAE, and even my ancient Qemu 0.9.0…)
The big thing is when adding networks, DISABLE DHCP. Â You can leave the rest where it is, it really doesn’t matter.

With Networks
As you can see, I’ve now added VMnet2 – VMnet7. Â This should give me enough user networks for now to play with. Â I’ve also unchecked the local DHCP service, as I may want to run my own DHCP on an emulated server to make sure DHCP relay works through my virtual network. Â Once you are happy, you can hit Apply and it will create the network interfaces on your computer.
So many networks!
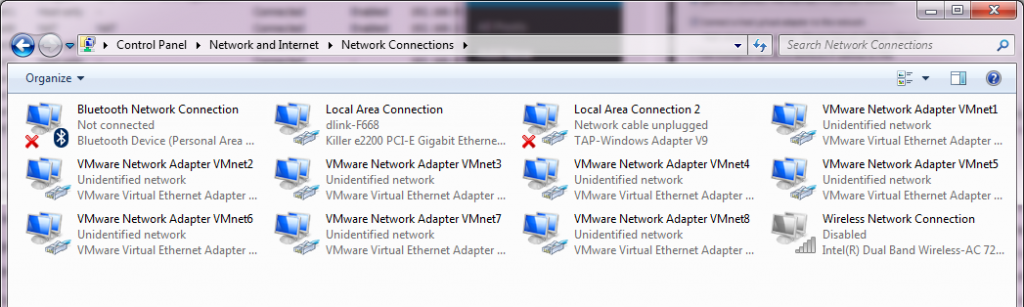
Now going into the control panel, and looking at the network adapters (search for “view network connections”), and you will see there are a bunch of these VMWare Network Adapters. Â The worst part is that they all have full networking enabled, which we don’t want. So starting with VMnet2, we need to unbind all high level access.
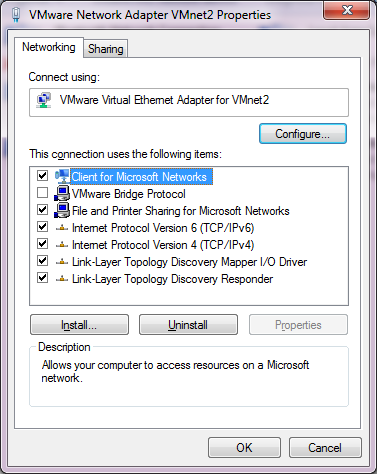
Before
I unbind the ‘Client for Microsoft Networks’, ‘File and Printer Sharing for Microsoft Networks’, and TCP/IP version 4 and version 6. This the Link-Layer topology discovery stuff.  I also enabled the VMware Bridge Protocol.
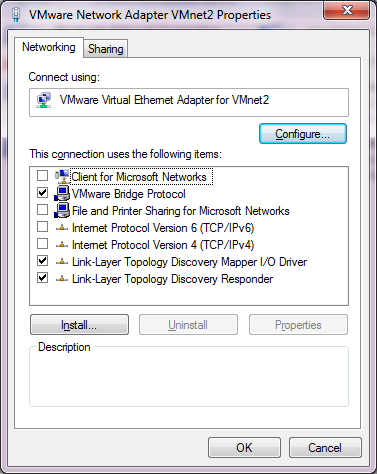
After
Now I just have to repeat this for each of the adapters that we installed, in this case VMNet2 – VMNet7. Â Remember to leave VMNet0, VMNet1 and VMNet8 alone!
Now for the real fun, you have to reboot for the changes to take effect.
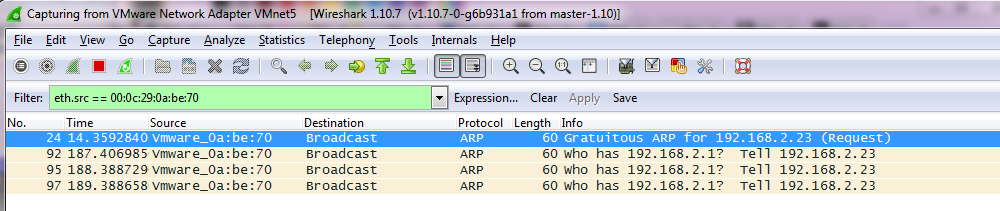
After a reboot, if you run Wireshark, you should now see all the interfaces!
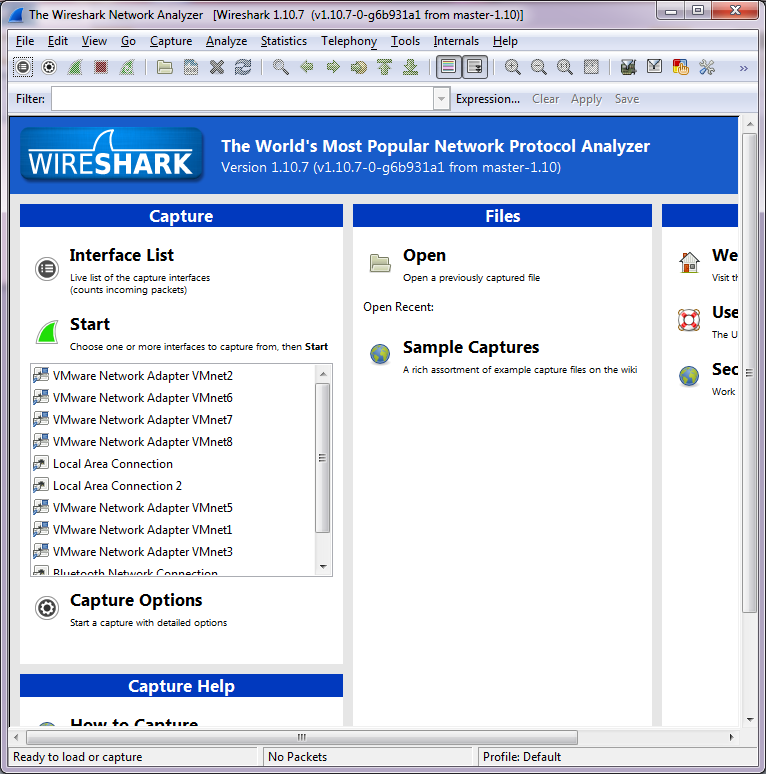
Wireshark with the new interfaces
Ok so far, so good, but let’s tie this mess together!
HHGTTG refrence
So let’s build a network. Â Our “home” site will have a server network with the ESXi server serving some virtual servers, a user network which will contain our management workstation & a MS-DOS netware machine. Â We will then have a remote network with different machine types, which will be a 4.3BSD VAX, and an Amiga running NetBSD. Â We’ll also include a Novell Netware 3.12 server. Â Add in an ‘internet’ router, and we should be good.
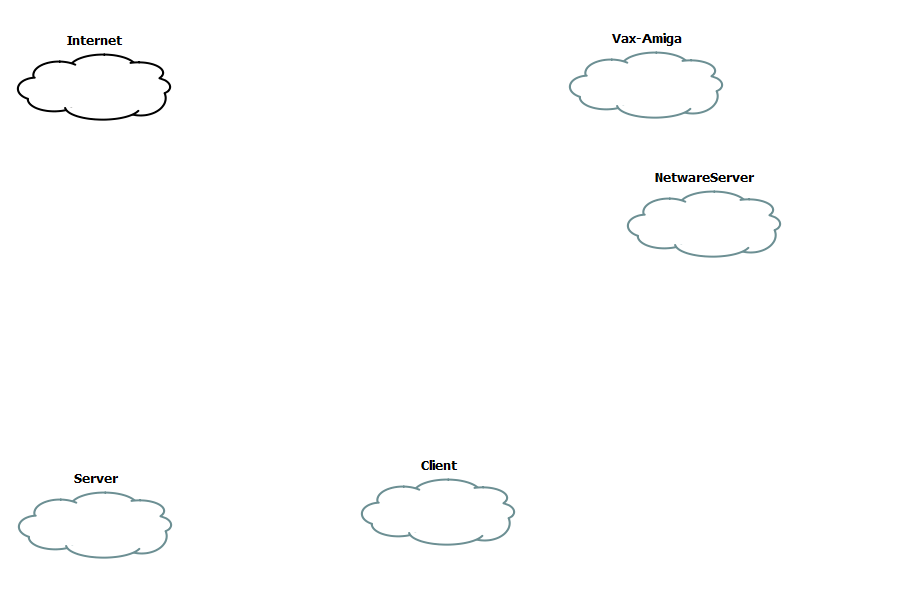
Clouds
The first step is to create some clouds. Â Each one of these will then be associated with a VMNetwork device.
[table]Network,Device
Server,VMNet2
Vax-Amiga,VMNet3
NetwareServer,VMNet4
Client,VMNet5
Internet,VMNet8[/table]
Now you’ll notice that I’m assigning VMNet8 to the ‘internet’. Â If you remember the original VMWare table, the VMNet8 device is a ‘NAT’ device. Â So we can use that to get to the internet (well anything else the base device can access). Â Now I’ve gone ahead and added in two cisco routers, a single juniper router and a hub, as the juniper device cannot directly connect to the Internet cloud, but using the hub for the intermediary is ok.
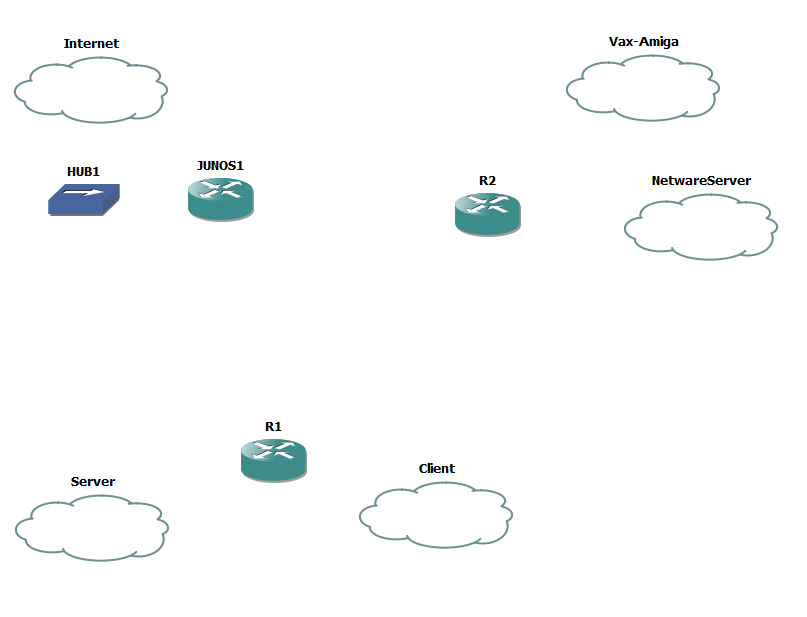
Add in the routers & hub
Now it’s time to add some interfaces to the routers. Â I’m going to put the C7200-IO-2FE into both R1 & R2, along with a PA-4T+ serial adapter. Â Because I want to pretend to have a fast internet connection I’m also going to place a PA-GE interface into R1 in slot 2.
Now we need to bind each cloud to the corresponding VMnet interface.
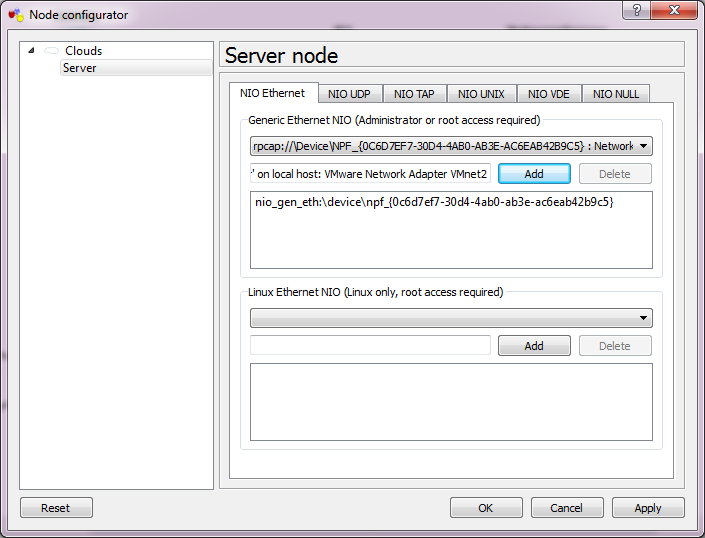
Server Network
Simply double click on the cloud, and select the VMNet interface from the drop-down list, then add it and the interface is now bound. Â Repeat for each of the clouds.
Now we can connect the interfaces.
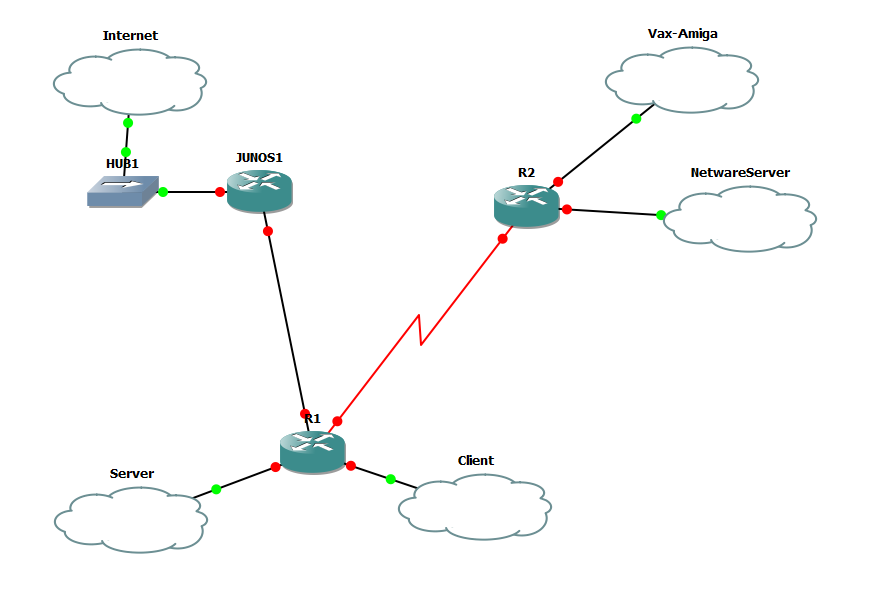
Now with Interfaces
So R1’s FA0/0 is connected to the SERVER cloud, FA0/1 is connected to the CLIENT cloud. Serial 1/0 is connected to R2’s Serial 1/0 interface. the G2/0 interface is connected to Junos1’s e1 interface
R2’s FA0/0 is connected to the VAX-AMIGA cloud, and the FA0/1 is connected to the NETWARESERVER cloud.
Junos1’s e0 is connected to HUB1, which is then connected to the INTERNET cloud.
[table]
NAME,Interface,IPX,IP
Server,VMNet2,,192.168.0.0/24
Vax-Amiga,VMNet3,,192.168.1.0/24
NetwareServer,VMNet4,cab2,
Client,VMNet5,cab3,192.168.2.0/24
Internet,VMNet8,,DHCP
serial,none,cab0,192.168.255.0/30
GigE,none,,192.168.255.4/30
[/table]
Configure the network interface in VMWare Player
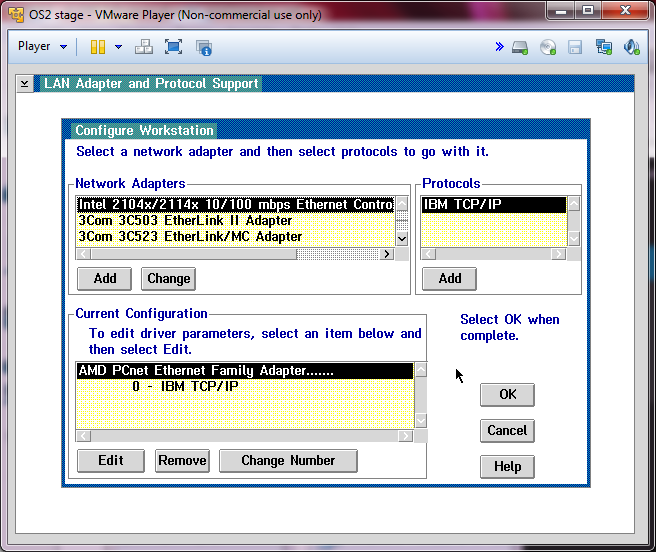
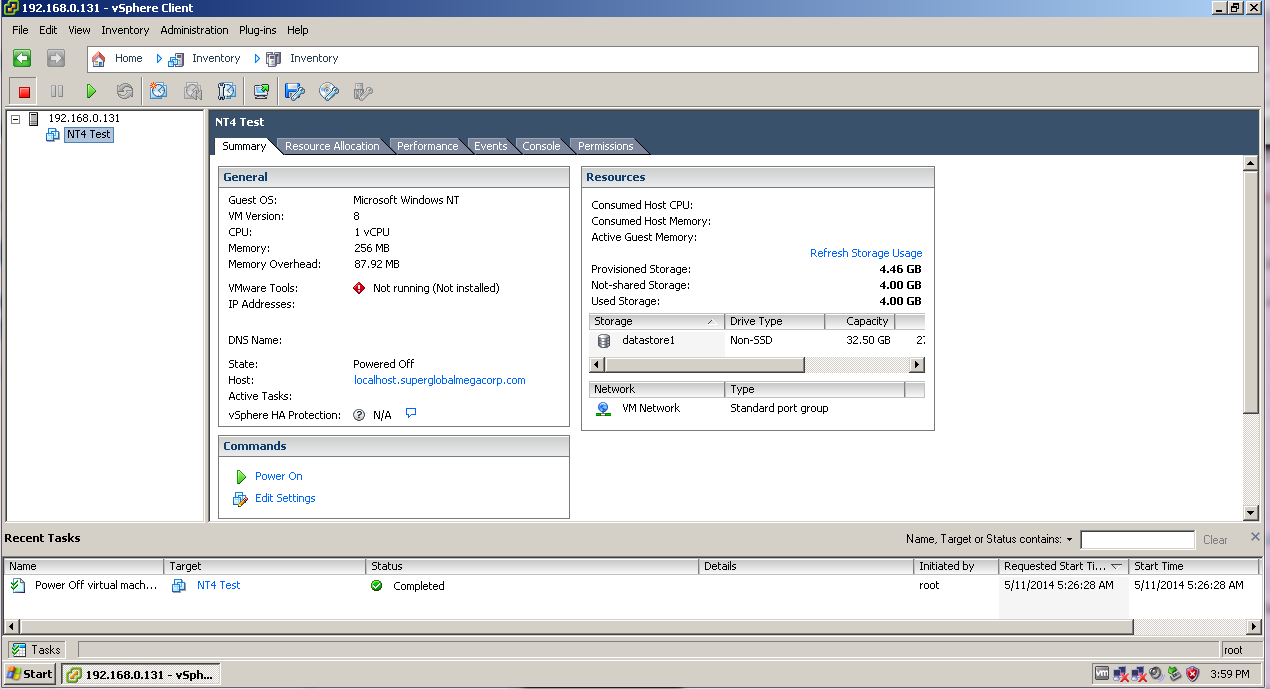
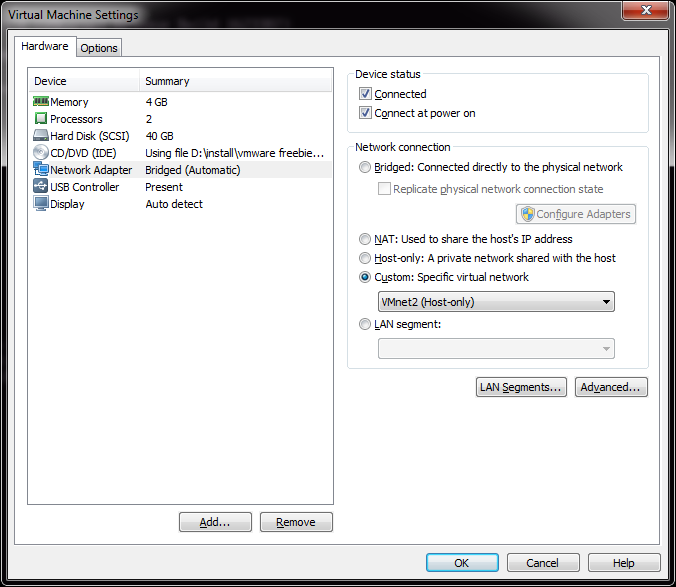
Since I already have an ESXi VM on Player, I’m going to use this for my illustration. Â All I need to do here is change the existing network from being ‘bridged’ on my native network, to now being on VMnet2, which now places it inside of my GNS3 world. Â Likewise I take a Windows XP client, and place it on VMnet3.
Now to configure R1 like the following:
[table]
Interface,IP-Address,OK?,Method,Status,Protocol
FastEthernet0/0,192.168.0.1,YES,manual,up,up
FastEthernet0/1,192.168.2.1,YES,manual,up,up
Serial1/0,192.168.255.1,YES,manual,up,up
GigabitEthernet2/0,192.168.255.5,YES,manual,up,up
[/table]
And R2 like the following:
[table]
Interface,IP-Address,OK?,Method,Status,Protocol
FastEthernet0/0,192.168.1.1,YES,manual,up,up
FastEthernet0/1,unassigned,YES,unset,up,up
Serial1/0,192.168.255.2,YES,manual,up,up
[/table]
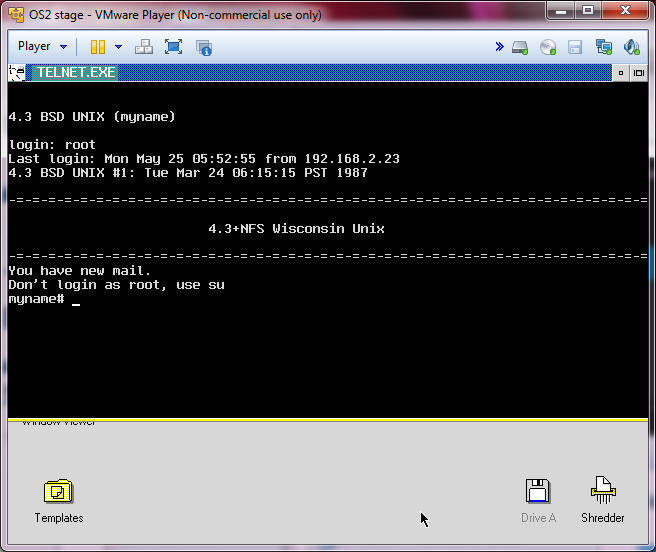
And now I can connect from my Client PC, the VMware ESXi server!
Connection
This gives me an easy way to ‘view’ into what is going on for my client to connect to the server.
Now some quick EIGRP to get R1 & R2 routing together..
R1:
router eigrp 1
network 192.168.0.0
network 192.168.2.0
network 192.168.255.0 0.0.0.3
no auto-summary
R2:
router eigrp 1
network 192.168.1.0
network 192.168.255.0 0.0.0.3
no auto-summary
And now we can check routs on R2, and see it’s learnt the routes from R1:
 192.168.255.0/30 is subnetted, 1 subnets
C 192.168.255.0 is directly connected, Serial1/0
D 192.168.0.0/24 [90/2172416] via 192.168.255.1, 00:15:50, Serial1/0
C 192.168.1.0/24 is directly connected, FastEthernet0/0
D 192.168.2.0/24 [90/2172416] via 192.168.255.1, 00:15:50, Serial1/0
I was a little disappointed though, that Olive can’t do any flow based stuff like security policies or NAT.
So onward with SIMH. Â I’ve found that I have a LOT of Ethernet interfaces and some things cannot deal with that. Â I had to make a trivial change to sim_ether.h:
#define ETH_MAX_DEVICE Â Â Â Â 32 Â Â Â Â Â Â Â Â Â Â Â Â /* maximum ethernet devices */
SIMH had this value hard-coded to 10, and it crashed because I have… 11 interfaces. Â So it just took a quick re-compile and now I can see my interfaces!
0 \Device\NPF_{0C6D7EF7-30D4-4AB0-AB3E-AC6EAB42B9C5} (VMware Network AdapterVMnet2)
1 \Device\NPF_{1A17F8DF-DC65-420E-9A7A-3F8D22EC0D12} (VMware Network AdapterVMnet6)
2 \Device\NPF_{5A889C62-8180-4DB5-8FFE-3B6B8B9DFFAF} (VMware Network AdapterVMnet7)
3 \Device\NPF_{A6B89C5C-C28C-424E-B795-F90F97FA0FE7} (VMware Network AdapterVMnet8)
4 \Device\NPF_{21FFD0D4-1B8B-47B7-B0DD-28CD67DF4080} (Local Area Connection)
5 \Device\NPF_{70AA2D26-7B96-42FB-9FA6-8A7386753099} (Local Area Connection 2)
6 \Device\NPF_{98F44EE6-626B-48CB-952D-9C890F44A4A5} (VMware Network AdapterVMnet5)
7 \Device\NPF_{D294A70E-07B3-4CA8-A88D-D6C392696E99} (VMware Network AdapterVMnet1)
8 \Device\NPF_{F746872D-7687-4867-958C-96A62BA5E284} (VMware Network AdapterVMnet3)
9 \Device\NPF_{783262C6-8B95-4F9E-B198-78E2D9B256BB} (Bluetooth Network Connection)
10 \Device\NPF_{D6726593-C290-4821-8D43-D180CF5631BA} (VMware Network AdapterVMnet4)
Wow!
So with SIMH I can now attach to eth8, which maps to VMnet3.
set xu ena
att xu eth8
Easy, right?
And even better, it works!
R2#ping 192.168.1.15
Type escape sequence to abort.
Sending 5, 100-byte ICMP Echos to 192.168.1.15, timeout is 2 seconds:
!!!!!
Success rate is 100 percent (5/5), round-trip min/avg/max = 8/15/28 ms
R2#
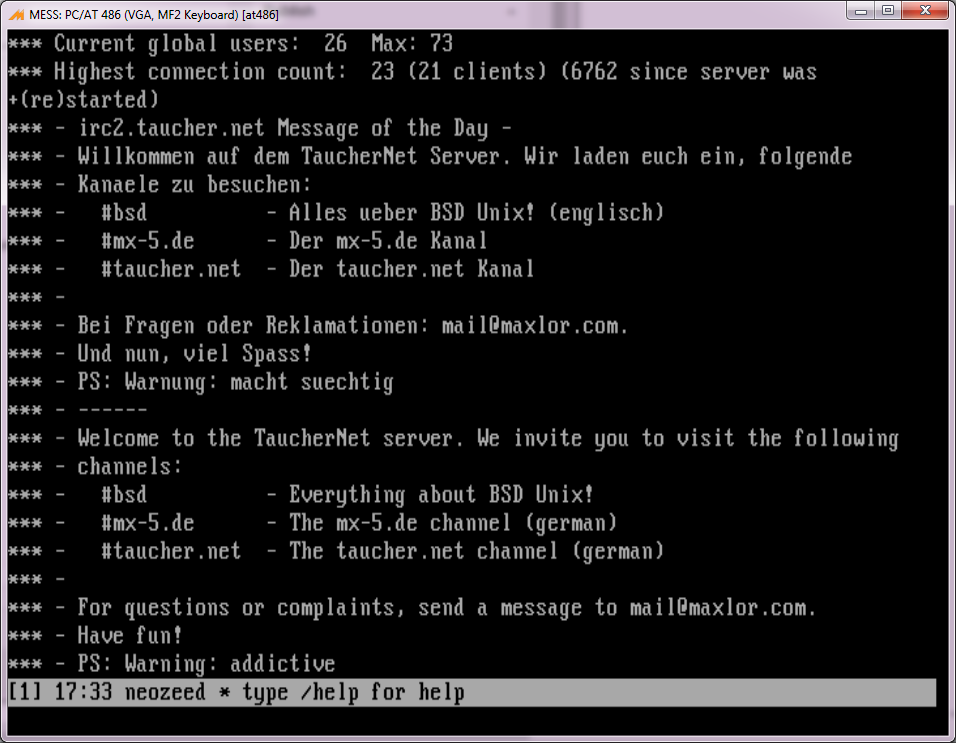
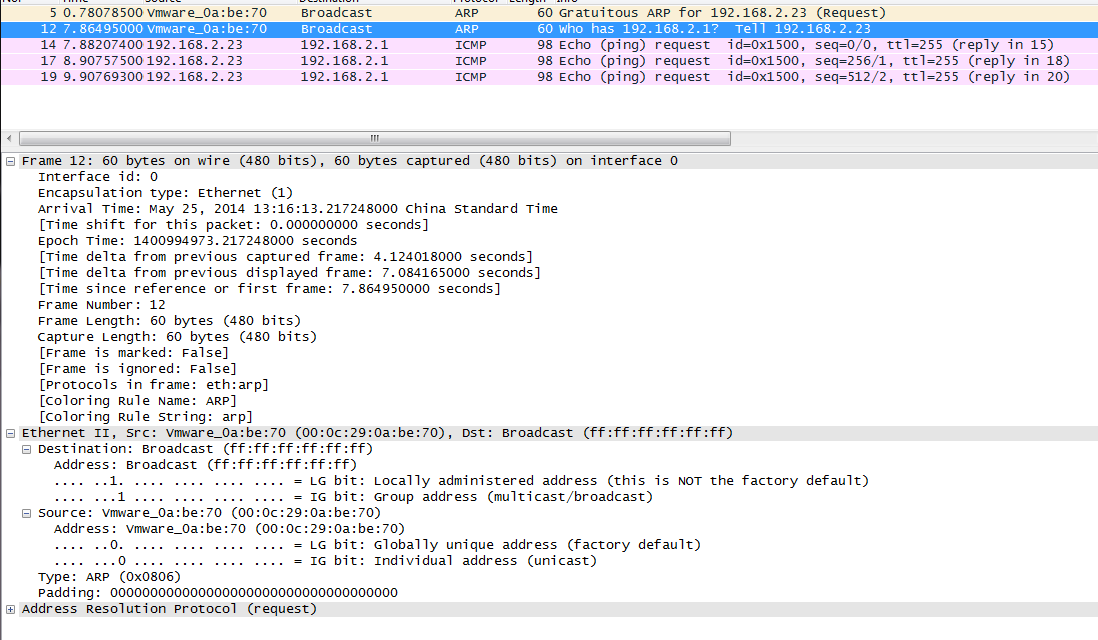
And the XP workstation can telnet to it…
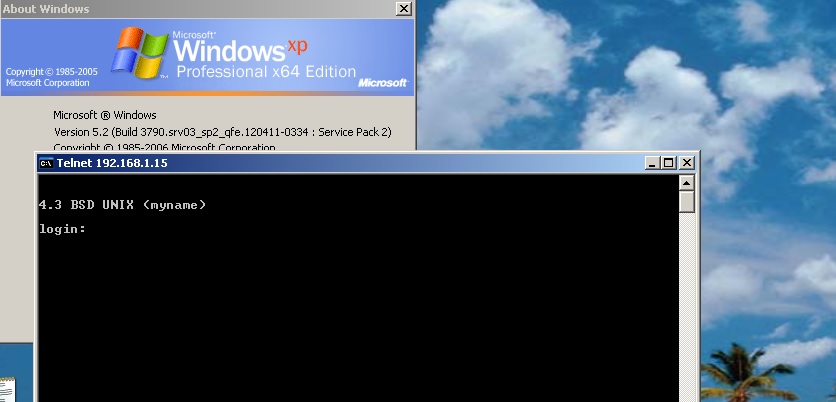
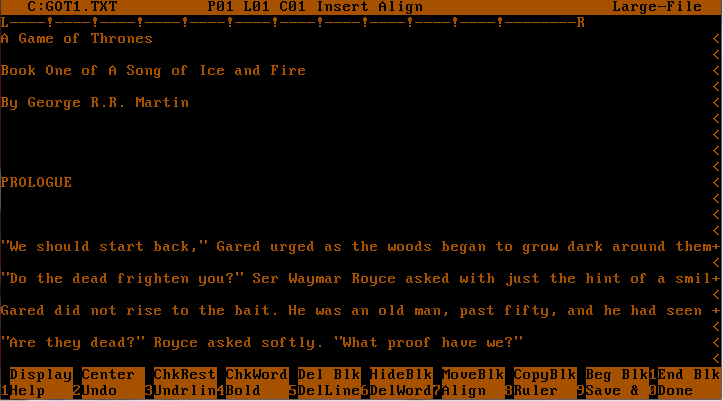
VMWare routed through GNS3
Next I’ll have to add in some NetWare fun. Â For the heck of it. Â Good news is that it works!
One caveat I’ve found is that sometimes the ARP response time isn’t so hot, and it seems like everything times out.. Â So you may want to tweek the default arp age on the cisco side (interface bla/arp timeout 600..?).