Same old OS, same old problems.
The UnixWare 7.1.1 install program has a date & time Y2k problem. And this always ends in whatever licensing you give it to install will expire and be nullified. Luckily this time while re-installing on VMware I saw if you defer the license on install, It’ll grant you a temporary eval license. It’s not going to matter as it’ll immediately expire, but it get’s us past the install.
Qemu however let’s you rev up the time machine and specify a starting time
-rtc base=1999-09-29T15:00:00As simple as that. I found for installing with Qemu 8.0 (Latest win32) binary it worked well enough like this:
"c:\Program Files\qemu\qemu-system-x86_64.exe" ^
-m 1024 ^
-hda UnixWare711.vmdk ^
-cdrom SCO_UnixWare711.iso ^
-net nic,model=pcnet ^
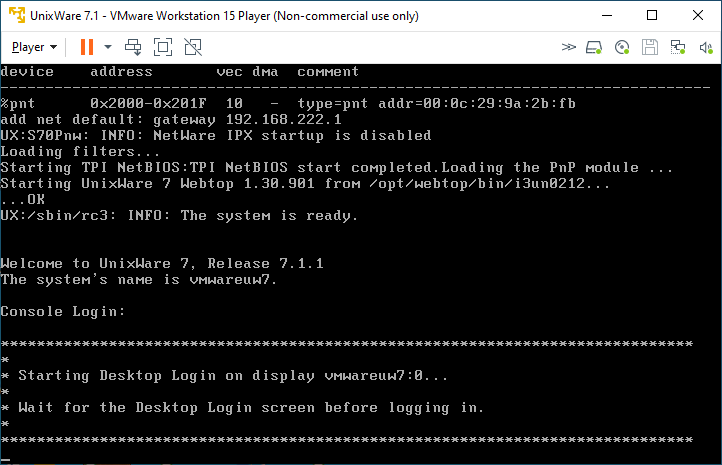
-rtc base=2010-09-29T15:00:00Installation in a stock boring VM goes fine, there is built in support for the AMD PCnet driver, so things ‘just work’. And then on the VMware reboot it never launches X11.
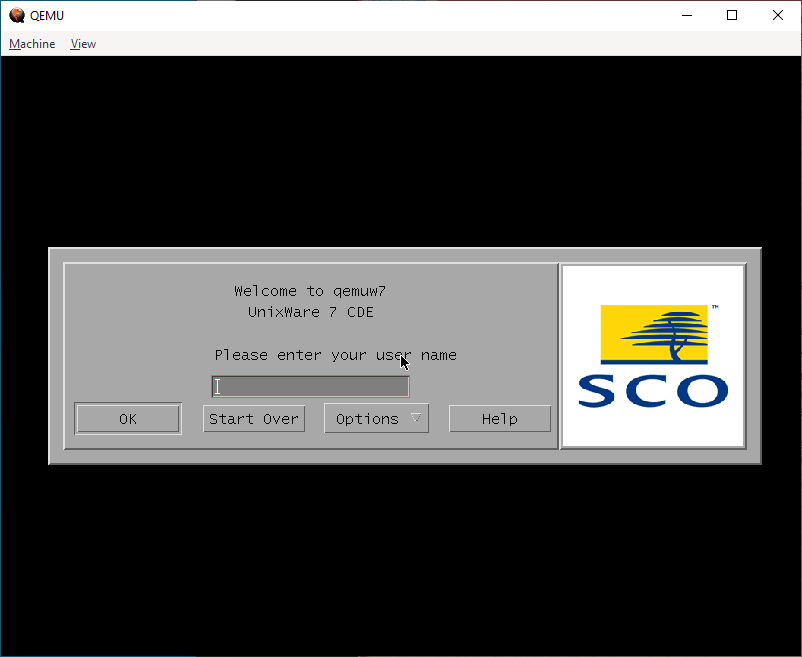
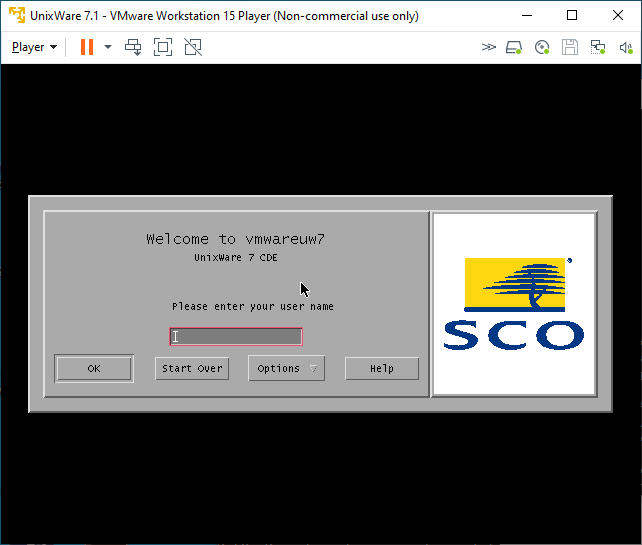
Under Qemu, I’m greeted by CDE and the login page. On VMware however…
I know t his used to work on VMware, but there is some regression in the VESA video driver. The fix was to use scoadmin and knock the video settings down to stock VGA. Luckily I have an X server running on Windows, so I could just export the display and set it up.
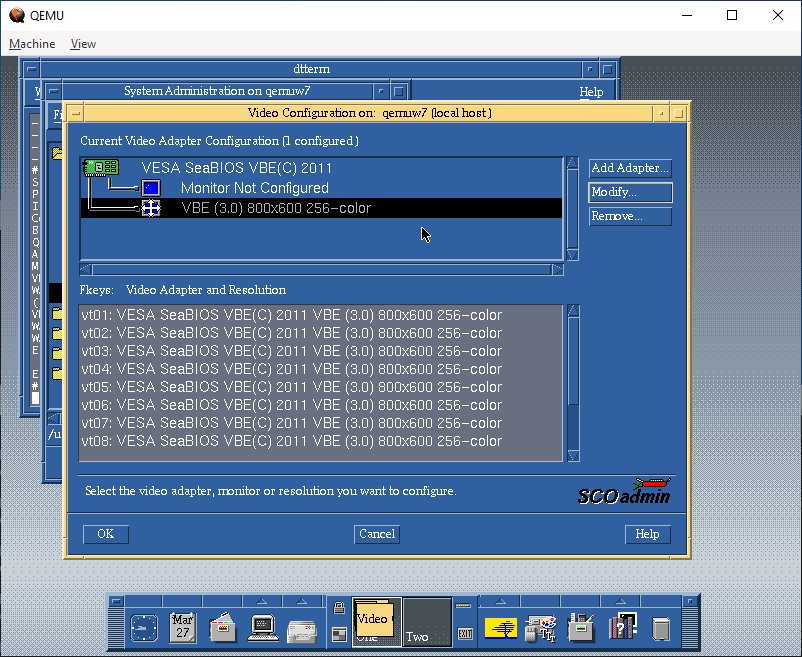
Whereas I had to set VMware to VGA:
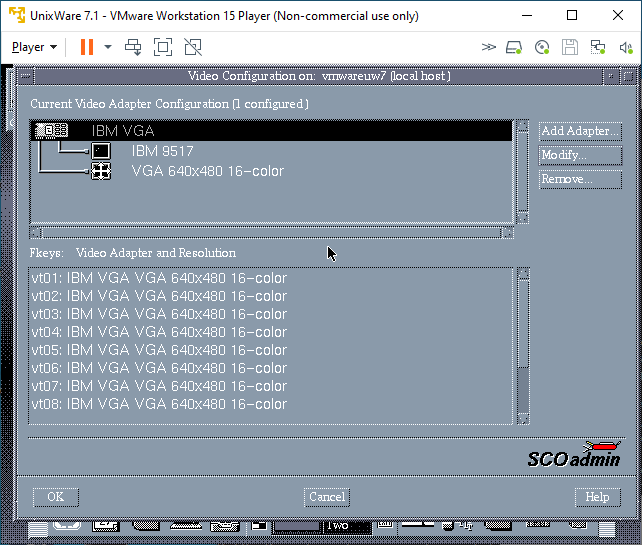
And one more reboot, and I was at least given a graphical console:
Inputting the licenses
Being a commercial Unix from back in the day, it relies on License Numbers, and activation codes to actually use the software. I have the box, so I have codes so yay me. Post install, I could remove the expired licenses, and then input the ones that were in the box.
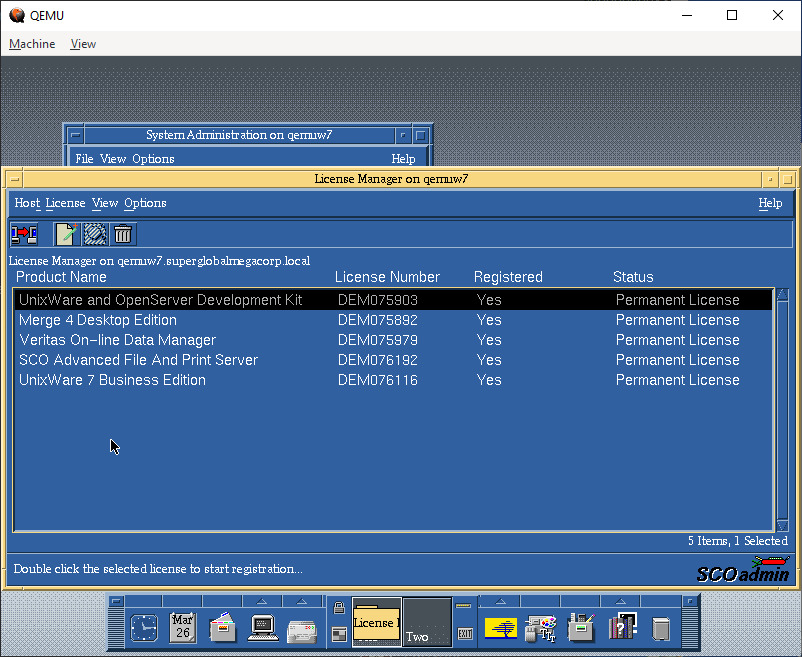
These are 5 user licenses, just enough to show off the system, I suppose: The advanced features of the day are nothing special these days, but it’s nice to have the PCC derived compiler, if not to compile GCC but more so for SYSV code from back in the day.
Networking
Networking for VMware is straightforward, I use the NAT interface VMnet8 that is installed by default, selecting a valid Tcp/IP address on the interface range gives me not only full internet access, but also allows me to easily telnet into the VM.
Qemu however…
"c:\Program Files\qemu\qemu-system-x86_64.exe" ^
-m 1024 ^
-hda UnixWare711.vmdk ^
-net nic,model=pcnet ^
-net user,hostfwd=tcp::42323-:23
I had been using the user mode SLiRP code for ages, but after all the MIT PC/IP fun, I was thinking I bet modern Qemu supports UDP transport for network traffic, and that it’d just integrate with HecnetNT just fine. And it does!
"c:\Program Files\qemu\qemu-system-x86_64.exe" ^
-m 1024 ^
-hda UnixWare711.vmdk ^
-net nic,model=pcnet,netdev=hecnet ^
-netdev socket,id=hecnet,udp=127.0.0.1:5001,localaddr=127.0.0.1:5000
Configuring the HetnetNT bridge was simple, as always make sure you have Wireshark/pcapng installed and simply run ethlist to get the list of interfaces:
D:\qemu>ethlist.exe
Network devices:
  Number       NAME                                     (Description)
  0  \Device\NPF_{E79F6278-3E7E-4547-955A-2080A0473AD6} (Local Area Connection* 8)
  1  \Device\NPF_{1D960E08-2A3A-43F7-BAD6-21FCB466717B} (Local Area Connection* 7)
  2  \Device\NPF_{98053A85-B049-45A0-AC33-961E2C136FCA} (Local Area Connection* 6)
  3  \Device\NPF_{BFA868ED-E508-4436-B085-EC815C4C544C} (LoopBack)
  4  \Device\NPF_{C75EAF23-0FA3-433B-B271-9CB0F5EB92D0} (VMware Network Adapter VMnet8)
  5  \Device\NPF_{B615DE21-AEC3-4347-916C-332AC4A4DA70} (VMware Network Adapter VMnet1)
  6  \Device\NPF_{82E5A370-6D3D-40AD-A9D5-C4E0E0C50F0D} (Ethernet)
And then create a simple bridge.conf file with the VMnet8 adapter and the UDP pariing to talk to Qemu:
[bridge]
update 127.0.0.1:5000
vmnet8 \Device\NPF_{C75EAF23-0FA3-433B-B271-9CB0F5EB92D0}


[tcpip]
update
vmnet8
Then launch the bridge program listening on port 5001:
D:\qemu>hecnet.exe 5001
Config filename: bridge.conf
Adding router ''update''. 0100007f:5000
Opening pcap \Device\NPF_{C75EAF23-0FA3-433B-B271-9CB0F5EB92D0}
Adding router ''vmnet8''. 00000000:0
Host table:
0: update 127.0.0.1:5000 (Rx: 0 Tx: 0 (Drop rx: 0)) Active: 1 Throttle: 0(000)
1: vmnet8 0.0.0.0:0 (Rx: 0 Tx: 0 (Drop rx: 0)) Active: 1 Throttle: 0(000)
Hash of known destinations:
Adding new hash entry [52:54:00:12:34:56]. Port is 0
Adding new hash entry [00:50:56:c0:00:08]. Port is 1
Adding new hash entry [00:50:56:f1:dd:d0]. Port is 1
Adding new hash entry [00:0c:29:9a:2b:fb]. Port is 1
It’s a little bit more involved to setup as we have to link the 2 programs via UDP, but I can say it’s totally worth it.

I can now easily FTP files into Qemu, and of course telnet as much as I want to. I don’t see why NFS wouldn’t work either.
Which brings us to the bigger elephant in the room, which one is ‘worth the squeeze’?!
I thought it’d be fun to do a totally unfair CPU intensive thing like building GCC. I would do a quick stage 3 compile blindly running this:
./configure --host=i386-sysv4 --target=i386-sysv4 --prefix=/usr/local/gcc-2.5.8
make
make stage1
make CC="stage1/xgcc -Bstage1/" CFLAGS="-g -O"
make stage2
make CC="stage2/xgcc -Bstage2/" CFLAGS="-g -O"
make stage3
make CC="stage3/xgcc -Bstage3/" CFLAGS="-g -O"
This way we can just look at the timestamps between completed releases. It does build C++ & ObjectiveC as well, and compared to machines from 1999 this is amazing!
-rwxr-xr-x 1 neozeed other 3495688 Mar 29 12:42 ./cc1
-rwxr-xr-x 1 neozeed other 2646888 Mar 29 12:37 ./stage1/cc1
-rwxr-xr-x 1 neozeed other 3495720 Mar 29 12:39 ./stage2/cc1
-rwxr-xr-x 1 neozeed other 3495688 Mar 29 12:40 ./stage3/cc1
Qemu timing
VMware timing
-rwxr-xr-x 1 neozeed other 3884076 Mar 28 20:12 ./cc1

-rwxr-xr-x 1 neozeed other 2647116 Mar 28 20:11 ./stage1/cc1

-rwxr-xr-x 1 neozeed other 3884124 Mar 28 20:11 ./stage2/cc1

-rwxr-xr-x 1 neozeed other 3884076 Mar 28 20:12 ./stage3/cc1
As you can see VMware is substantially faster when it comes to computation. This shouldn’t come to anyone as any surprise. And this isn’t a fair competition, but it does show that you can stage GCC on Qemu just fine, so that’s actually great!
Now let’s mix in some more nonsense, I have a Merge license so let’s try it! First off it really wants Windows 95 from CD-ROM. It will not accept anything else. I have a hacked-up copy of the floppy version of Windows 95 on CD-ROM, and it accepted that just fine, it appears to search through.CAB files looking for files to setup it’s preferred environment. I’m not all that familiar with the whole thing as PC’s are cheap, and virtual machines are even cheaper!

After the setup completed, I thought I’d try my Sarien 286/386 ports.
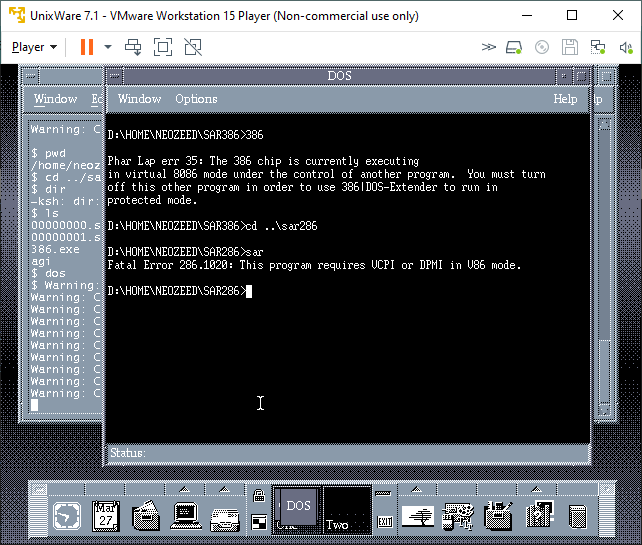
Sadly, neither worked. Maybe it’d have better luck with Windows 95 actually installed. I wanted some high colours so I went over to Qemu and found out that it cannot run Merge.
The error lies in a missing opcode 000000FF. Maybe it’s invalid to trigger an exception to call between DOS and the supervisor?
Either way it doesn’t matter, it doesn’t work. I did get feedback that it does run under KVM.
I don’t know why I didn’t think about doing the HecnetNT bridge earlier as it gives things far more flexibility for tapping into networks, or even being transported. I guess I should look at other transport mechanisms besides UDP since it’s 1:1. Also, it might be worth dropping the protocol restrictive filters to allow everything on the wire to flow.