
(this is a guest post by Tenox)
This is a step by step guide on how to install Venix/86 on PCem, by runner up of Venix/86 Virtualization Challenge – Mihai Gaitos of hawk.ro. Thanks for a great work!
Rebuilding Venix for PCEM:
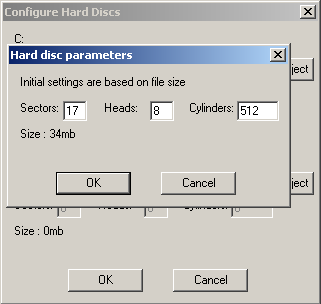
First, in order to avoid problems with weird HDD parameters I chose a reasonable hdd geometry – 512 cylinders, 8 heads, 17 sectors (most drives back then had 17 sectors).
HDD geometry:
BIOS Autodetect:
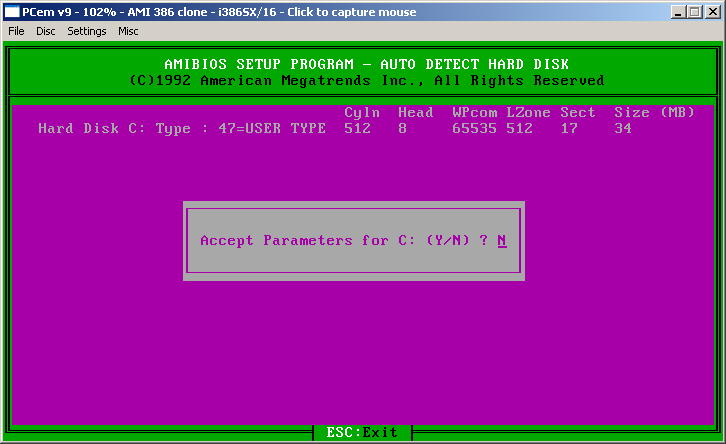 (answer “Y” here)
The obvious approach of Booting the XFER.IMG and then switching to BACKUPn.IMG doesn’t work, failing with “Soft error”:
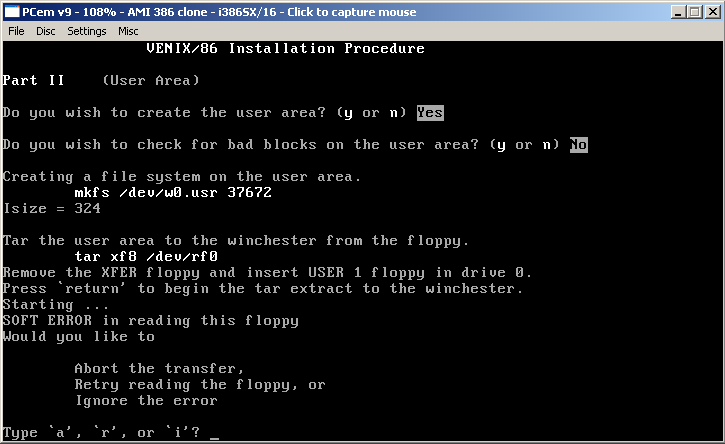
There are two problems here:
1. The boot (XFER.IMG) and backup (BACKUPn.IMG) diskettes are different sizes: 360KB(5.25″ DD) and 1.2MB(5.25″ HD). PCEM doesn’t know how to handle that. If the disk drive is set to 1.2MB it won’t boot the XFER.IMG. Setting it as 1.44 (3.5″ HD) in BIOS will boot XFER but it won’t read the BACKUP diskettes (see image above)
2. The install script on the XFER diskette assumes DD diskettes.
My solution for the first problem was to convert XFER.IMG image to 1.2MB with a simple C program (xf.c attached).
For the second one, I modified the disk image using a hex editor as follows:
Searched for xf8 (the tar command can be seen when running the installation) and replaced xf8 with xf7 (upon looking at the images the first 7 only /usr on them) and replaced /dev/rf0 with /dev/rh0 next to it
Searched for xf5- and replaced that with xf2- as well as /dev/rf0 with /dev/rh0
Saved the modified image as xfer_12m.img
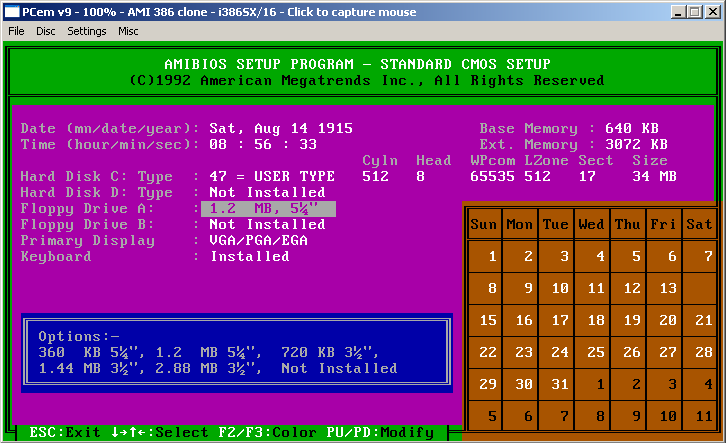
Set the emulated machine to 1.2 MB
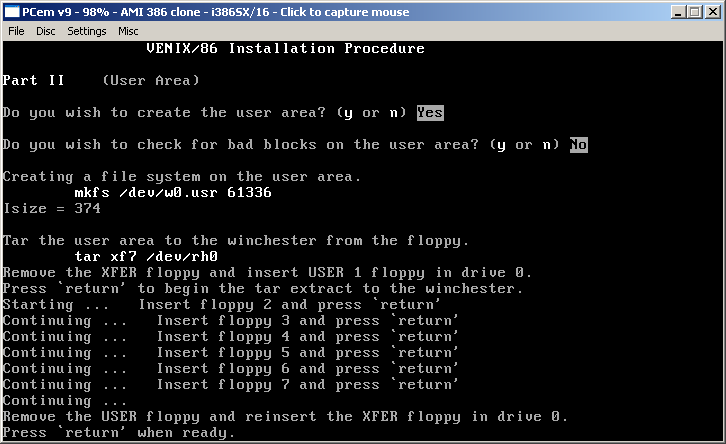
Booting from the newly modified image, the installation proceeds without errors. Let the installer partition the drive, respond affirmative to create user area (and negative about bad sectors check), then:
For USER 1to USER 7 use BACKUP1.IMG to BACKUP7.IMG
After USER 7 you will be asked for the XFER disk – use xfer_12m.img again
Next step will be the system area, here the bad sectors check is automatic. For SYSTEM A use BACKUP8.IMG and for SYSTEM B use BACKUP9.IMG
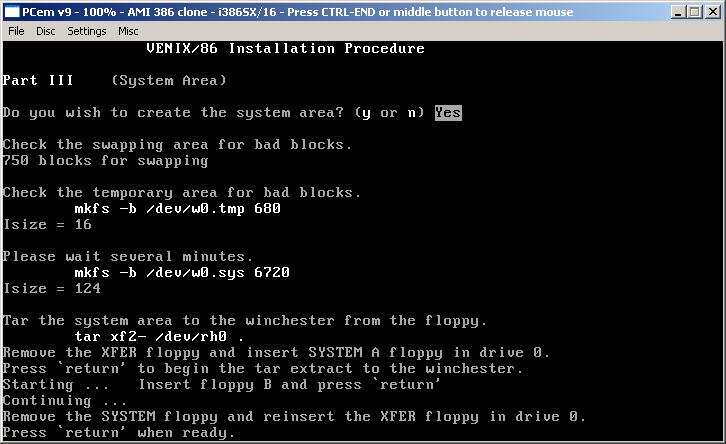
Again, for XFER use the modified (xfer_12m.img) image. After this, the timezone selection screen appears:

Just for fun I entered relevant values. Anyway, the system (as well as the emulated host) is *not* y2k compliant.
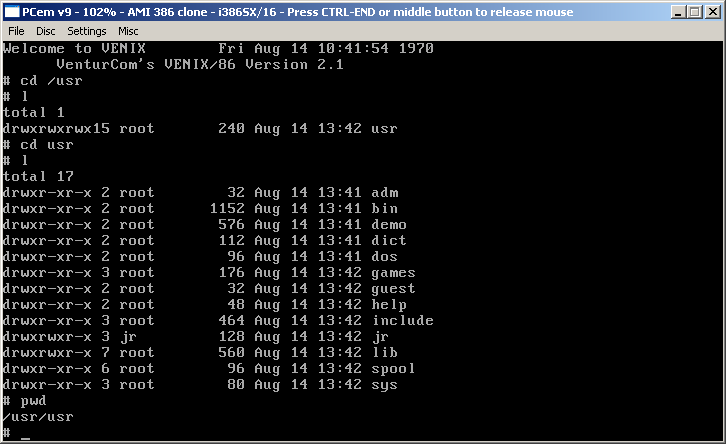
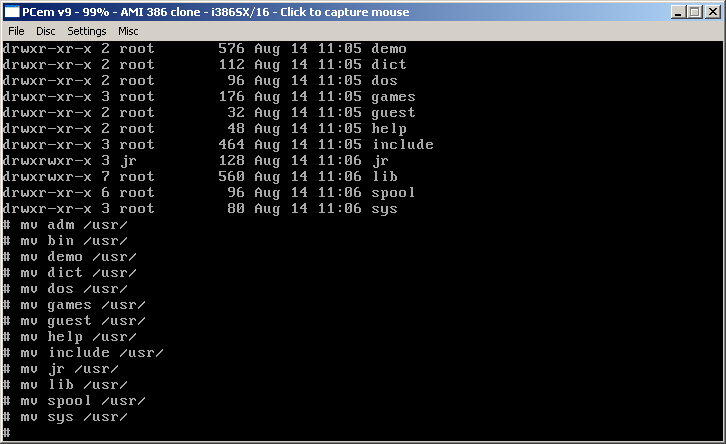
There is, however, a slight problem with this approach. Everything inside /usr was in fact in /usr/usr. Nevertheless, the system is bootable and after a few mv commands all is well.
 In order to avoid the error at boot, /etc/checklist has to be modified and the line
/dev/w1.usr:User Area:
is to be removed. vi is available so this is not a problem.
For transferring files to the system, create a tar archive with the files, run it thru another small program (t2vi.c attached) that would insert a 15*512bytes gap after each 15*512byes block and then pad the file to 80*2*15*512 bytes in order to make a floppy image. This image can then be used with tar xf /dev/rh0 on the running system. The reverse process is left as an exercise to the reader 🙂
Enjoy!
Mihai
A ready made PCem disk image
Also updated: xfer_12m
Also Mihai sent me this:
 Hope he can get more stuff out 🙂
Also stay tuned for another challenge coming soon 🙂
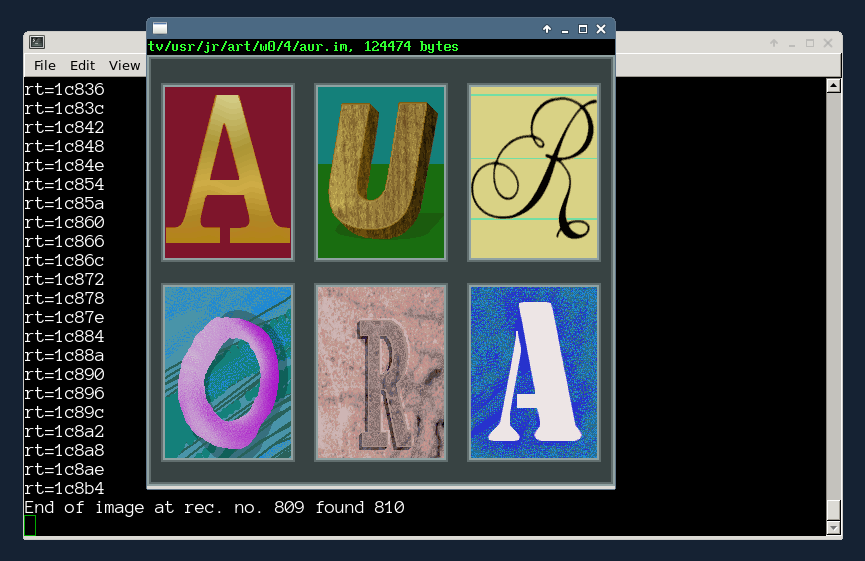
A (quite long) story about understanding and decoding the .im files can be found at
http://hawk.ro/stories/venix2.html
There is also an archive with png versions of the images.
C sources of the decoder to follow.
And should anyone care for the Aurora file decoder (except animations) I have cleaned and released a viewer/converter:
http://hawk.ro/stories/aurora1.html